|
PART III: The Animation |
|
Step 19: You're the Captain |
 |
Now that our ship is ready to go, we need to get our head into the Captain's
seat.
- Open both your Face and Spaceship files in Photoshop
- We need our head in a layer group to make it easier to move it around and
resize it and such, so place the Cartoon and Backing layers (we won't need the
Face or Freehand Grade layer) into
a layer group (if you don't remember how to do a layer group...and I don't see
how you couldn't seeing that you've made about a billion of them through the
course of this project...then jump back to Step 10...or
Step 11...or Step
12...or Step 13...or Step 14...and so on...)
- Rename the layer group to Head
- Use the Move Tool and click and drag the Head layer group to your spaceship
- Close the Face file - when Photoshop asks if you want to save the
file click No
You should notice at this point that your head is ENORMOUS compared to
your spaceship...this is ok, it is supposed to be like this. We can easily
resize our head, but to do so we must first unlock the Cartoon layer, which
should still be locked from Step 08.
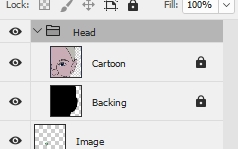
- Expand the Head layer group by clicking the expansion arrow pointed at below...

The layers in the group should now be visible...
- Unlock the Cartoon and Backing layers
- Collapse the Head layer group by clicking the same arrow you
clicked in direction 6 above
- With the Head layer group selected, click Edit then point at
Transform and click Scale
Instead of trying to click and drag the resize handles (which you probably
can't even see) we are going to decrease the width and height percentages in the
Scale's options bar.
- Locate the W: and H: values...

W changes the width of the image and H changes the
height. We could change each value separately, but since we know at this point
that we want both the height and width to change by the same amounts, we can
simply set it so that when we change one Photoshop automatically changes the other. The
little chain icon (called the Maintain aspect ratio button...remember that from
Step 13?) between the width and height values will do this for us.
- Click the Maintain aspect ratio button - it should now appear
selected as in the graphic below...

- Click in the W: section and type 25 - notice when you do
this that the H:
section changes automatically to 25%...

Your head should now be a much more manageable size...

- Click on your head and drag it so that it is sitting in the captain's seat of your
spaceship...

- Press Enter on the keyboard to apply the transformation
- Click and drag the Head layer group down until it is at the
bottom of the layer stack...
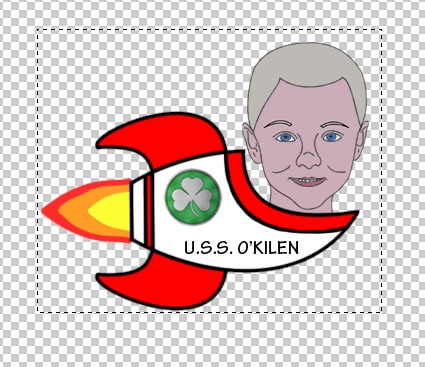
Your head should now appear to be inside the ship
My head currently looks like this..
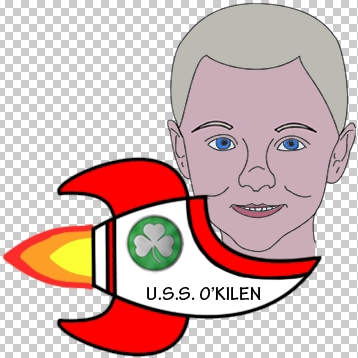
The head is still too large, so I will need to resize it again. Also,
since the face seems to be leaning toward the left, it would actually sit better
in the cockpit if I flip the head horizontally so that it is the other way
around. Take a look at your head and determine if you are happy with it or if
you need to make additional changes.
- If you need to make additional adjustments, do so now - keep in
mind that your head should be cartoonish and large, but it should not be
bigger than the spaceship...
For my head above, I decreased the size a little more and used
Edit > Transform > Flip Horizontal to get the head to face the opposite direction
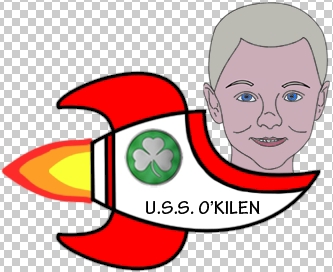
At this point you may notice that there is a great deal of wasted space
around your spaceship. This was useful when we were working with our huge head, but
will be cumbersome as we try to combine our spaceship with our space scene. We
need to crop (trim away the unwanted areas) our image.
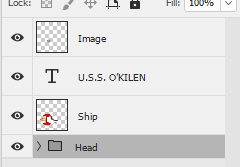
- Click the top layer in your layer stack (which should be your Image
layer) then press and hold the Shift key and click the Head
layer group to select everything in your Layers panel...
- Click the Create a new group icon
to create a new layer group (yes, you can have a layer group - in this case
the Head layer group - inside another layer group)
- Click the Rectangular Marquee Tool
- Click and drag to create a selection box around your head and your
spaceship...
- Click Image then click Crop, notice that Photoshop removes
all areas of the image outside the selection box
- Press Ctrl+D to deselect the image
Our ship is now ready to go. In the last step we will get it flying thru
space.
- Save your Spaceship file
01 |
02 |
03 |
04 |
05 |
06 |
07 |
08 |
09 |
10 |
11 |
12 |
13 |
14 |
15 |
16 |
17 |
18 | 19 |
20