|
PART II:
The Space Scene |
| Step 16: Asteroids |
 |
Asteroids are rocks floating through space. We will use a few filters and
some new tools as we insert (at least) 3 asteroids into our space scene.
- Open your Space
file in Photoshop
- Turn off the visibility of all of your layers
- Insert a new layer at the top of your layer
stack and name it Asteroid1
- Click the Lasso Tool and set Feather on the Lasso Tool's
option bar to
5px...

- Press Ctrl+R on the keyboard to turn on Photoshop's Rulers
- Zoom in until you can see an area of your image that is about 300x300
pixels in size - use the ruler you just turned on to determine when you have
zoomed in enough...

The ruler above is displaying approximately 335 pixels
Since many of us are using different screen resolutions, it is not possible
for me to give you an exact Zoom amount. You want to zoom in to a point where
you can create a nicely shaped asteroid and ensure that it is not too big, as
having an overly large asteroid will cause problems later on.
- Draw an ovoid shape...
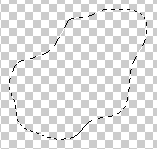
Don't draw it too close to the edge of your image - keep in mind that you
will move it later
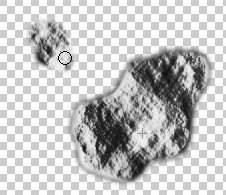
An important thing to keep in mind here is that you want to create an
asteroid shape that is oval. In other words, make sure it is roundish, kinda
like a fat potato or a dented egg. Avoid creating an asteroid that is oddly shaped or has strange things sticking
off of it such as this...
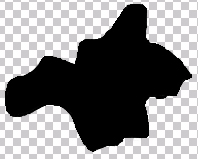
While asteroids like this are physically possible and in fact do exist, they
are very rare. Rounded asteroids are far more common (asteroids tend to get rounded
by colliding with other asteroids which, over time, breaks off protruding pieces of
rock) and will look much better in our
space scene because they will be easily recognizable as an asteroid where the
shape above will cause many viewers of our image to say "huh?"
- Press D on the keyboard (remember what this does?)
- Press Alt+Backspace on the keyboard (remember what this does?)
- Press X on the keyboard (this is the keyboard
shortcut to swap the Foreground and Background colors) - you should now
have white as your Foreground color and black as your Background color
- Click Filter then point at Render and click Clouds - your shape should
look something like this...
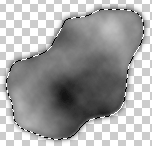
Keep in mind that you will have a different shape than mine
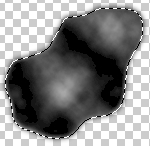
- Click Filter then point at Render and click Difference
Clouds - your shape should look something like this...
- Click Filter and then click Filter Gallery...
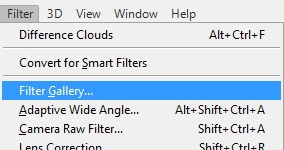
to open the Filter Gallery window
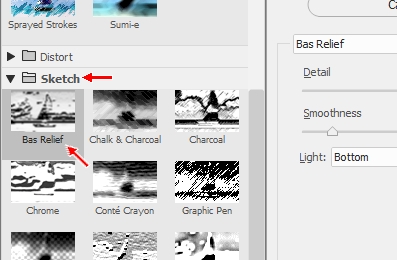
- Click the Sketch group and then click on Bas Relief...
- Make Detail and Smoothness match the image below...
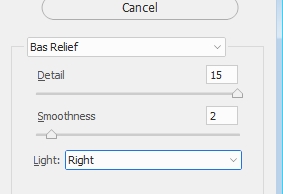
For the Light option, you can choose either Left or Right, so click on each
one and see which one gives you the best looking asteroid
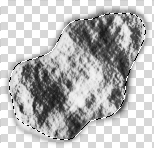
- Click OK to exit the Filter Gallery - your asteroid should look
something like this...
- Press Ctrl+D to deselect your asteroid
So far our first asteroid looks pretty good. We are not done with it, but
let's take a moment right now to quickly create another asteroid and then we
will do some additional editing on both of them to make sure that they do not
look exactly alike. We are going to create the second asteroid by cheating a
little and duplicating pieces of the first one.
- Press Ctrl+R to turn off the Rulers
- Insert a new layer at the top of the layer stack and name it Asteroid2
- Click the Clone Stamp Tool...

The Clone Stamp Tool allows you to
copy one area of your image onto another area. In other words, you can
create an exact 'clone' of one part of your image and place it in another part
of your image. For us, we will be using the Clone Stamp Tool to use pieces of
our first asteroid to build our second asteroid. Follow the directions below,
and exactly how the Clone Stamp Tool works will become obvious.
- Double-click the Hand Tool...

This will set your zoom level so that you can see your entire space
scene at once (at this point your space scene should contain only your first asteroid and the transparent
checkerboard pattern because you should still have the visibility of all of
the other layers turned off)
- Click the Clone Stamp Tool and in the Brush Preset picker select the Soft Round brush and set the size to 30 px
To use the Clone Stamp Tool,
we first need to
determine the area of the image we wish to copy - which for us is parts of
our first asteroid - and then we need to determine where we want to copy the
parts of the image to - which for us will be in a blank area beside our first
asteroid. Let's try this and see how it works.
-
Press and hold the Alt key -
notice that as you hold the Alt key down that the cursor changes to a tiny
target...

this is how Photoshop tells you that you are about to define an area to
clone from - click in the center of asteroid 1 and
release the Alt key
It may look like nothing is happening, but Photoshop remembers
where you clicked and will begin copying what is at that spot to the new area when
you begin to draw.
-
Move the cursor to the empty area beside asteroid 1
-
Click and drag the mouse around - notice as you do this that
Photoshop places a tiny + sign over the spot where you originally
clicked in direction 23 and that as you drag the tiny plus sign is following
the motion of your mouse
Most of you will notice a slight problem at this point - nothing is actually being
drawn. So what's going on? It turns out that by default Photoshop is set up to
clone regions only on one layer, and since the layer we are currently drawing on
(which should be Asteroid2) is blank, we are not actually drawing anything right
now. To fix this problem, we need to make a quick adjustment to our Clone Stamp
Tool's options bar.
-
On the Clone Stamp Tool options bar, set Sample: to Current & Below....

This will allow us to pull from not only our current layer but also from the
layer directly below it
-
Alt+click once more on the center of asteroid 1
-
Move the cursor to the empty area beside asteroid 1 and
click and drag the mouse around - you should now be cloning
asteroid 1 in the new location...
Draw until you have created a new asteroid approximately half the size of
asteroid 1...
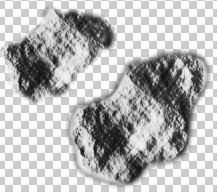
Try not to make the overall shape of your second asteroid the same shape as
the first one, and avoid the edge of asteroid 1 (it has a less than perfect
edge that we will need to deal with later)
Remember that since Photoshop is copying whatever is in the original area
that if you go off your asteroid that nothing will be copied.
Looking at asteroid 2 at this point you may notice that it looks like a
miniature version of asteroid 1 (because it is). Let's do some quick adjusting to make
asteroid 2 look a little more unique.
- Make sure the Asteroid2 layer is the active layer
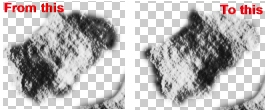
- Click Image on the menu bar and point at Adjustments and
click Invert...
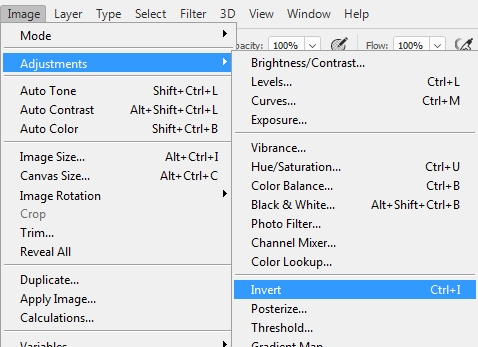
This turns the dark parts of our asteroid light and the light parts dark...
- Press Ctrl+T on the keyboard to enter free transform mode
- Change the size of the asteroid in some way - you can drag any
resize handle to make the rock wider, thinner, taller, shorter, or use a
corner to adjust both height and width at the same time - then rotate
it so that it sits at a different angle from asteroid 1...
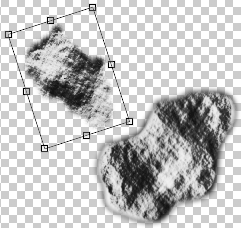
- Press Enter to apply the transform
You should now have two asteroids that hopefully do not look like exact copies
of each other. If you are happy with your two asteroids then skip the following
direction, but if your asteroids still look too much alike, do this:
- If your asteroids still look alike, click the Eraser tool and use a
Soft Round size 50 px brush to remove parts of asteroid 2's edge until
it appears unique - remember to keep it roundish
Now let's make a quick adjustment that will give our space rocks some extra
dimension and help to keep the surface looking nice when we shrink them down in
the coming directions.
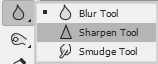
- Click the Sharpen Tool...

You may have to right-click the Blur Tool and then select the Sharpen
Tool...
- On the Sharpen Tool options bar, set Strength to
50%...

The Sharpen Tool increases the detail of our selection, which
will help to make our asteroids look like they are actually made out of rock.
- Make Asteroid1 the active layer
- On the Sharpen Tool options bar set the brush to Soft Round and
the Size to 30 px
- Click and drag an area of the asteroid you want to sharpen -
notice this process does not
result in a huge change...
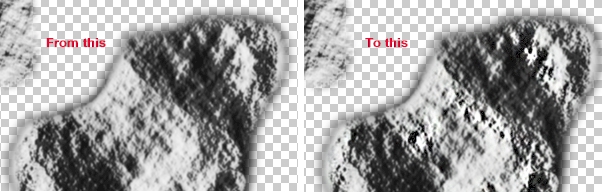
Do not sharpen the entire asteroid or your rock will look unnatural - we just want some additional detail so our rocks look like they actually
have peaks and valleys and will maintain a sharp, crisp appearance when we
make them smaller
- Repeat the above three directions on asteroid 2
Two asteroids down, so we just need to create one more. Keep in mind that you
can create more asteroids if you wish to make your scene unique (3 is the
minimum), but don't go crazy and add in tons of asteroids or your planets will
become fiery-asteroid-crashing-death-traps.
- Create an additional asteroid (name it Asteroid3) by going back to
direction 3 and following directions 3-17 and directions 35-39
Creating asteroid 3 from scratch ensures that our third asteroid is
completely unique and different from the other two. DO
NOT simply create your third (or any
other) asteroid by duplicating asteroids 1 or 2. If you do this you will get
NO credit for having
created your final asteroid. Also, your space scene will look stupid. Think about
it: there are not two identical asteroids floating around the universe. Take some
pride in your work.
At this point, if we turn on our other layers we will see that our asteroids
are actually pretty bright when compared to the rest of the stuff in our
image...

We need to make a quick change to each asteroid so that it looks
more like it is actually a rock flying through the blackness of outer space.
- Make Asteroid1 the active layer
- Click Image and point at Adjustments and click Levels
- Click on the Levels window's title bar and drag it to a spot where you can
see both the Levels window and your asteroid 1
- Drag the black Input Levels arrow...
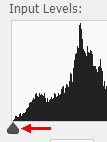
to the right until your
asteroid has a nice combination of light and dark areas - what amount you
use
is up to you, but a value between 70 and 120 will work best
- Click OK
- Repeat the above 5 directions for asteroids 2 and
3 (it is ok to set different level amounts for each of your asteroids
- the amount of light and shadow on each rock depends on where they are in
your space scene and thus will not be the same for each one when you move
them around a few directions from now)
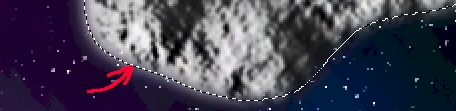
Things are looking pretty good at this point, but if you zoom in on asteroid
1 you will most likely see a potential problem...
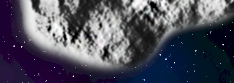
Notice the strange white glow around the edge of the asteroid? This is left
over from when we applied the filters at the start of this step and can end up being
a real issue when we resize our asteroids or when we move them around and place
them over other elements in our image and the white edge becomes noticeable.
Let's take a quick second to remove this edge.
- Make Asteroid1 the active layer
- Ctrl+click on Asteroid1's layer thumbnail to select
asteroid 1
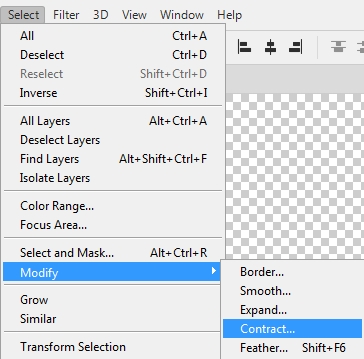
- Click Select then point at Modify and click Contract...
- In the Contract Selection window, set Contract By: to 10
pixels...
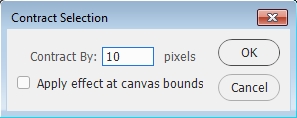
- Press OK
- Press Ctrl+Shift+I to invert the selection (everything EXCEPT
your asteroid1 should now be selected)
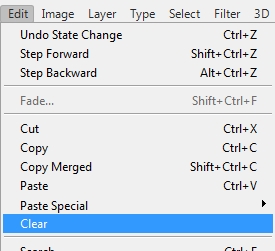
- Click Edit and then click Clear...
This should get rid of most of your problem areas. Have a look at your
asteroid and see if you have eliminated the glow problem. If you still have
glowing areas...
You can simply click Edit and then Clear several more times to gradually eliminate
it...
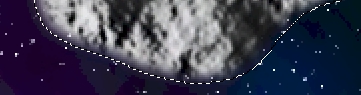
In the image above, I used Edit then Clear twice more to remove
the glow outside the selection.
- If glowing areas remain, simply click Edit and then Clear several more
times
Be sure that you are using Edit - Clear to remove the edge of your asteroid
and that you are not pressing the Delete key on the keyboard. Using the Delete
key will work, but only once or twice. Pressing it any more than that will
begin to impact the opacity of the entire asteroid instead of just the edge. If
you have problems that using Edit - Clear a few times will not fix,
then simply contract the selection, invert, and use Edit - Clear.
We now need to fix the other asteroids. Let's fix asteroid 3 first since we
created it the same way as asteroid 1.
- Make Asteroid3 the active layer and repeat the above 7
directions to fix its edge
Asteroid 2 should not have much of a problem with its edge because we created
it a different way from asteroids 1 and 3, but let's take a look at it just to
be sure.
- Make Asteroid2 the active layer and zoom in on it and see
if its edge needs to be adjusted - repeat the above directions if needed
(note that a smaller contraction, such as 5 pixels instead of 10, may work
best on asteroid 2)
Now that our asteroids are ready to go, let's get them in a more believable
size.
- Resize all your asteroids so they are in scale with the other objects
in your scene - you can make them different sizes so that they appear to be
different distances away (your asteroids should not be as large as your
planets, but instead should be awesome little [but not too little] additions
to your solar system)
- Resizing your asteroids may make them brighter than what we want, so
take a second now and have a look at your asteroids and see if they are too
bright - if they are so bright that they stand out in your scene (they
should appear to blend in and be an extra element in the background and not
the focal point of the scene), simply repeat directions 42-47 to make
them darker
- Scatter the asteroids throughout your image
- Select all of the asteroid layers...
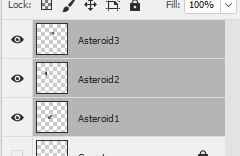
- Click the Create a new group icon
- Rename the new layer group Asteroids...
- Lock the Asteroids group
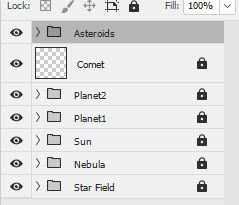
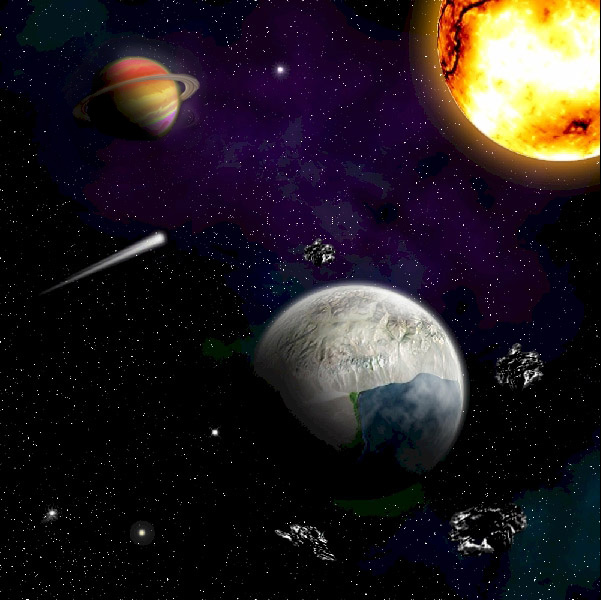
With all of your layer groups and layers turned on you should now have a space
scene similar to the one below...
We have all of the pieces of our space scene in place, so all that is left is
one final finishing touch.
- Save your Space file
01 |
02 |
03 |
04 |
05 |
06 |
07 |
08 |
09 |
10 |
11 |
12 |
13 |
14 |
15 | 16 |
17 |
18 |
19 |
20