|
PART II:
The Space Scene |
|
Step 12: Sun |
 |
We could just create a large glowing white spot and call it our sun, but
that would be a pretty boring sun. Take a look the following view of the
sun...
Yes, that is the actual sun. It was filmed using a special
filter that removes the glare and allows you to see the surface of the sun.
Notice that it is a very interesting and dynamic object. In this step, we are
going to try and create a sun that is similar to this one (ok, our sun will
not rotate, but it will look way more awesome).
Keep the following important fact in mind...
YOUR SUN SHOULD REMAIN
SELECTED FROM DIRECTION 8 THRU DIRECTION 39. IF YOU HAPPEN TO DESELECT YOUR
SUN, YOU CAN RESELECT IT BY PRESSING AND HOLDING THE Ctrl KEY AND CLICKING
ON THE SUN LAYER'S THUMBNAIL.
(A layer's thumbnail is the little picture between the eyeball
and the layer name)
(Ctrl+thumbnail click will select all of the non-transparent pixels on
the layer)
In other words, if you begin work on your sun but have to stop
before you are finished and come back to it at a later time, then you will need
to reselect the sun before you can continue with the tutorial.
- Open your Space
file in Photoshop
- Turn the visibility of the Star field and Nebula layer groups off
(they should both be locked)
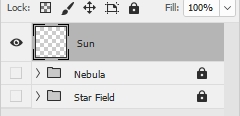
- Insert a new layer and name it Sun - make sure the Sun layer
is selected and is at the top of the layer stack...
- Press D on the keyboard to make sure Set foreground color is black and
Set background color is white
- Set the Zoom to 100% (the keyboard shortcut for this is
Ctrl+1)
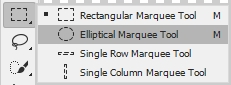
- Select the Elliptical Marquee Tool...

If you do not see the Elliptical Marquee Tool, it is likely because you have
the Rectangular Marquee Tool selected - right-click the Rectangular Marquee
Tool and then select the Elliptical Marquee Tool...
- Make sure the feather is set to 0px...

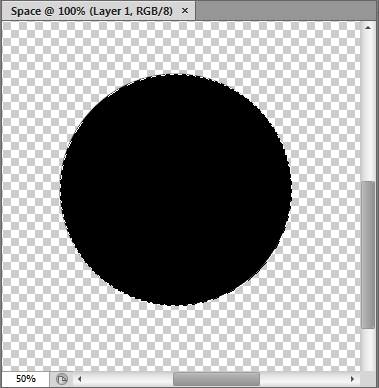
- Press and hold the Shift key then Click and drag to create a circle in the center of your canvas
(holding the Shift key as you drag makes sure the circle is
perfectly round, if your sun is an oval you will lose points!) - the circle should be fairly large, remember that images
lose very little quality when shrunk but can lose a large amount of
quality when increased in size
- Fill the CIRCULAR selection with black...
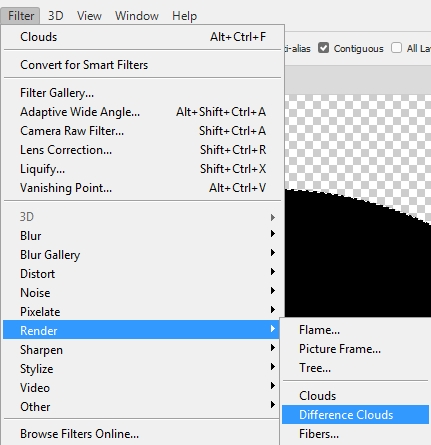
- Click Filter then point at Render and click Difference
Clouds...
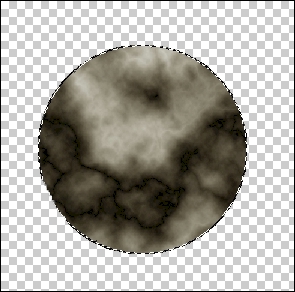
- Press Ctrl+Alt+F (this just reapplies the last filter you applied)
multiple times until you get a pattern that you
like - try to get a pattern with some dark streaks and lots of bright areas
- you should now have something similar to the image below...
- We need to make things a little brighter, so click Image then
point at Adjustments and click Levels...
- Drag the sliders so they are in approximately the same position as those
in the image below...
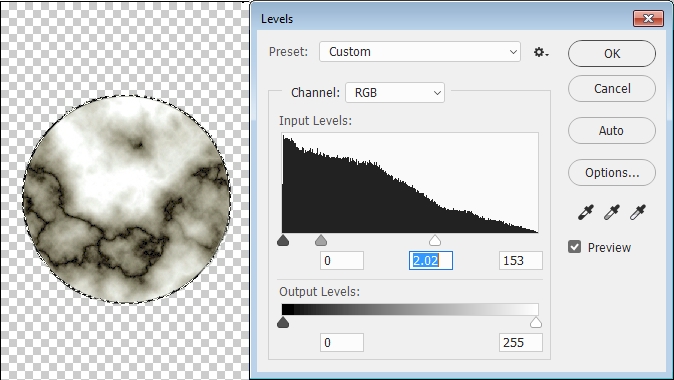
Don't try to make your sliders match mine exactly (your sun is different from
mine), instead move them to a
position that gives your sun a nice, unique pattern and a glow that you like
- Click OK
- Click Filter then point at Sharpen and click Unsharp
Mask...
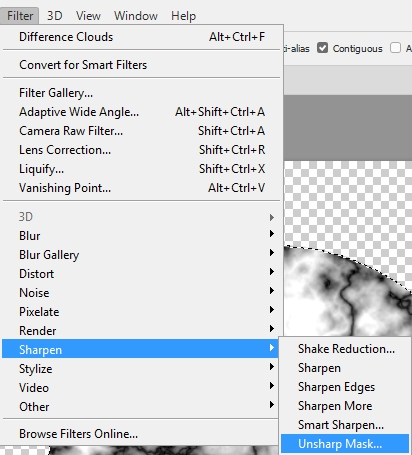
Despite its name, the Unsharp Mask Filter actually makes the image
sharper.....go figure.....
- Set the values to match those in the image below...
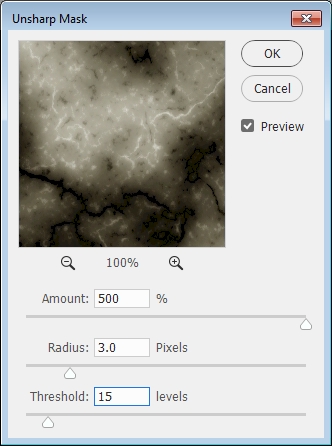
Notice that you now have a more detailed and interesting surface
- Click OK
- The sun looks flat, so let's give it a more spherical look - click Filter then point at
Distort and click Spherize (this filter causes the selection to
look like it is round)
- Set the Amount to 100%...
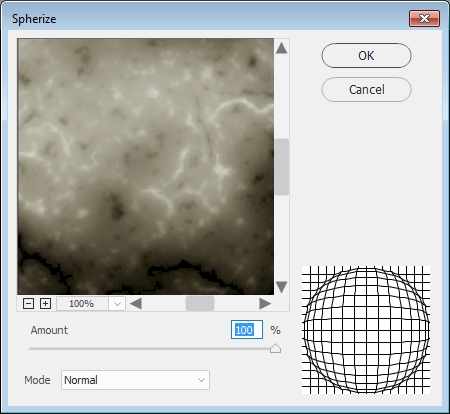
- Click OK
- Take a look at your sun and determine if you are happy with how
spherical it looks; if not, repeat the Spherize, but turn down the Amount
(most of you will want this second Spherize to have an Amount of 50%) -
when you are happy with how spherical it looks, move on...
To give you an idea of the changes we just made, in the image below, the sun
on the left is what I had after direction 14 while the one on the right is
after applying the Unsharp Mask and Spherize filters...
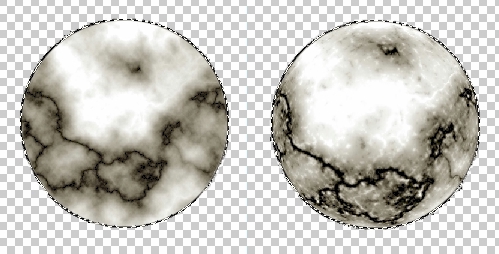
Notice how the sun on the right looks waaaaay cooler and rounder. And here
is the really interesting part - despite the two suns being the exact same
size in the image above, the sun on the right appears to be slightly smaller
because it seems to be bulging out towards you. I know, awesome. Ok, let's
add some color.
- Click Image and point at
Adjustments and click Color Balance... - we will need to change
each of the three settings pointed at with red arrows below...
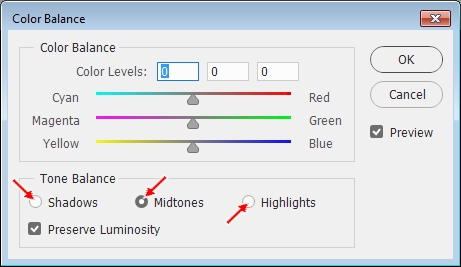
You need to change each value separately - keep in mind that since
everyone's sun pattern is different, you do not have to use the exact
numbers indicated in the next 3 directions; instead use them as the starting
point and make minor adjustments to the various values until you get a nice,
bright sun with a pattern you are happy with
- Click Shadows and change the Color Levels: settings to match the image
below...

- Click Midtones and change the Color Levels: settings to match the image
below...
- Click Highlights and change the Color Levels: settings to match the
image below...

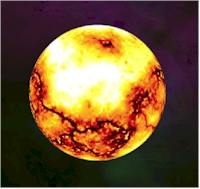
You should now have a sun similar to the one below...
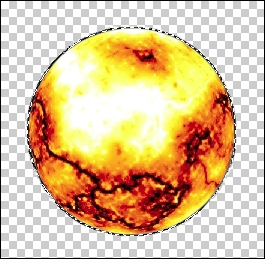
Remember that what we are making is the image of a sun if you were looking
at it without the incredible glow around it, otherwise we could just make a
really large star using the Burn Tool, but that would be a sun with no
character, and where is the fun in that?
- Click OK on the Color Balance window
Because the original circle that we drew was an ordinary circle with a
hard edge, most of us now have a sharp edge that will make our sun stand out
in our scene instead of blend in with the surrounding space, so
let's get rid of it.
- Make sure your sun is selected (if it is not, reread the
important directions at the top of this page)
- Make sure the Elliptical Marquee Tool is selected
- Click the Select and Mask... button...

To open the Properties panel...
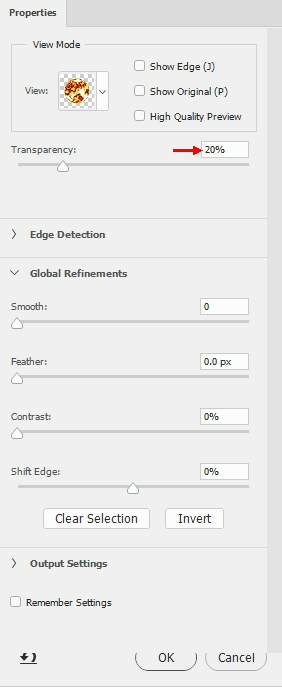
Notice that by default our selection is presented at 20% transparency (red
arrow above). Let's adjust this so that our sun is solid.
- Adjust the Transparency setting...
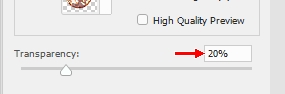
To 0%...
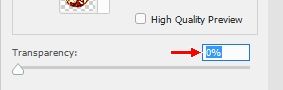
You sun should now be solid
Photoshop has the ability to detect what type of edge our selection has -
whether is it hard (like a table or piece of glass) or soft (like hair or fur). This
helps us to get as exact a selection as possible. If we turn on the Smart
Radius option, Photoshop will evaluate what is on either side of our selection
and try to determine exactly what it is. This is almost always a good thing.
Let's go ahead and turn this on so it will help us out.
- Click the menu arrow next to Edge Detection...
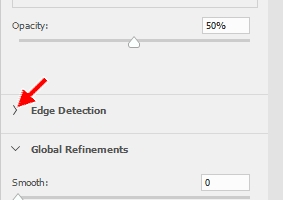
to open the options
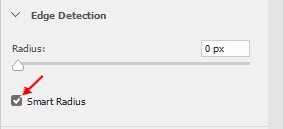
- Click the Smart Radius checkbox...
- Set the Edge Detection Radius to 10.0 px...
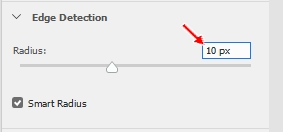
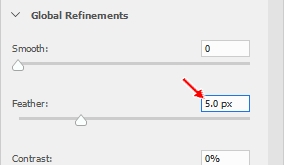
With this setting, we are telling Photoshop to take a look at the area within
10 pixels of our selection. We want to soften up our edge so that it appears to
fade off into the distance, so let's increase the Feather (which simply blurs
the edge a little).
- Change the Feather amount to 5 px...
- We have a slight problem in that Photoshop is blurring from our current
edge out, but we want the actual edge to soften as well, so let's contract
(make smaller) the selection just a little bit by setting the Shift Edge
option to -20%...

- Click OK to exit the Properties panel
- Click Select then click Inverse to select just the sharp
edge around your sun
- Press the Delete key to remove the sharp edge around your sun -
thanks to the feather setting we should now have a nice, soft edge to our
sun
- Press Ctrl+D to deselect the sun
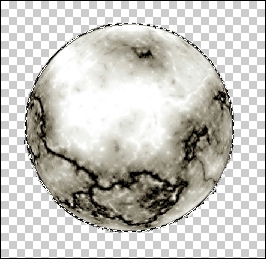
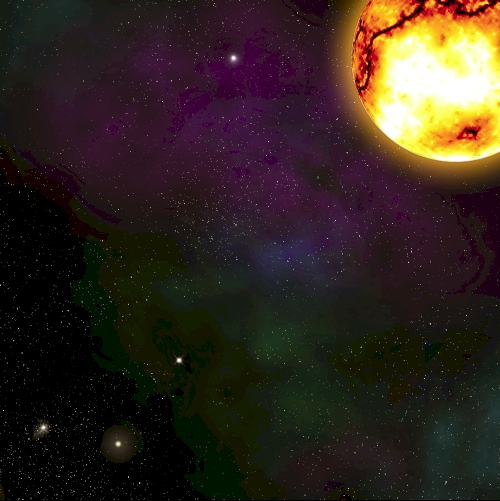
- Turn the visibility of your Nebula layer group on so you can see
your sun against a dark background - you should
have something like the image below...
Our sun is looking pretty good at this point, but we still need to give it
a corona (the glowing part just above the surface of the sun)
- Double-click the Sun layer where
indicated below...
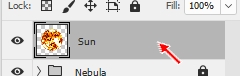
This opens the Layer Style window...
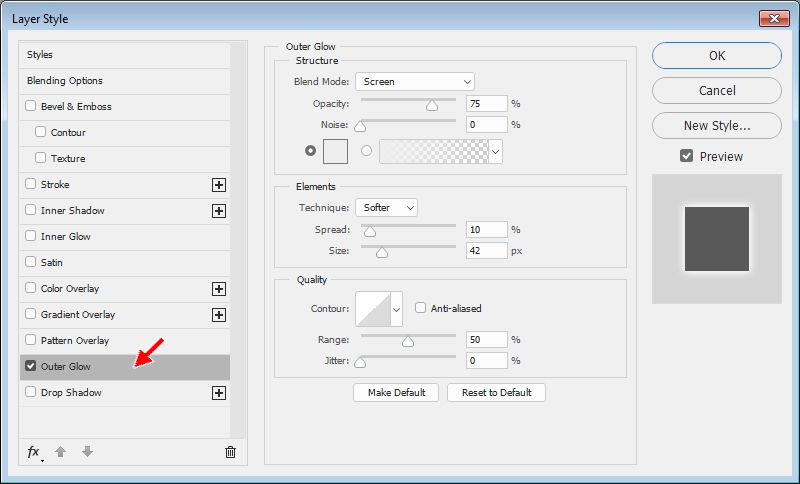
- Click the Outer Glow option (red arrow above)
Be careful when working with the Layer Style window. You will only see the
settings for each option if that option is highlighted in gray, as Outer Glow
is above. Note that it is possible to turn options on and off by clicking the
checkbox without actually selecting the option, so be sure that you have each
option selected - it is in gray - before you try to adjust its settings.
- We only need to make a few changes here: change the color to a
light orange, and increase the Size option to 75...
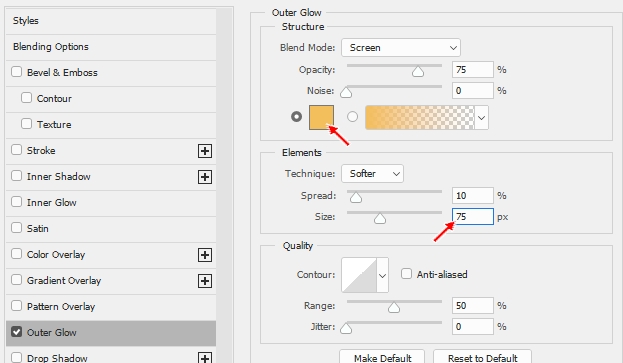
- Click OK
- You should now have something similar to the image below...
- Use the Move Tool to place your sun in a corner of your space scene - it
doesn't matter which corner you put it in, but be sure that what is showing
has more bright areas than dark (keep in mind that if you want it in a
specific corner but don't like the part of the sun showing on that corner
that you can always rotate the sun [click Edit - Transform -
Rotate] until an area that you like if visible)
- Click Edit then point at Transform and click Scale
and resize your sun (remember to hold down the Shift key as you resize your
sun so that you are changing the height and width at the same time) to make
it the
size you would like it to be - remember, this is your sun so it needs to be
large, but how large is up to you (don't make it too large or too small as
it will look unnatural)
- Click and drag the Sun layer onto the Create a new group icon
- Rename the new layer group Sun...
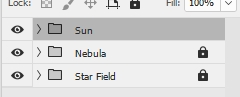
- Lock the Sun layer group
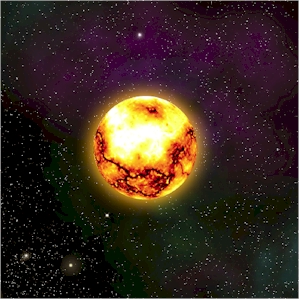
You should now have something similar to the image below - notice that I
flipped my sun around so that what is mostly visible is the brightest
portion...
We are now ready to add some planets to our space scene. We will make two
different planets using similar procedures, with one requiring you to use an
existing image and the other allowing you to build the planet entirely from
scratch. I know...awesome.
- Save your Space file
01 |
02 |
03 |
04 |
05 |
06 |
07 |
08 |
09 |
10 |
11 | 12 |
13 |
14 |
15 |
16 |
17 |
18 |
19 |
20