
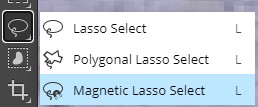
If you don't see the Magnetic Lasso Select Tool, you may need to right click the Lasso Select Tool and then click the Magnetic Lasso Select Tool...
|
Step 1: Intro
| Step 2:
Selecting | Step
3: Guy in City |
Step 4: Making
Adjustments | Step
5: Shadow |
Exercise |
| Creating a Giant in Photopea: Selecting our Giant |
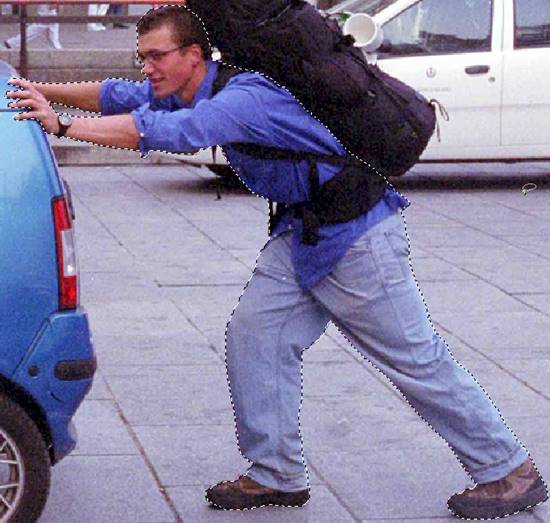
Our first task in getting our guy into the city photo is to make a selection of him. There are several ways to create a selection in Photopea, so let's use a method that will work well with our current image and give us a fairly accurate beginning selection: the Magnetic Lasso Select Tool. The Magnetic Lasso Select Tool allows us to create selections by tracing the outline of an object in our image. For this to work, we need to start with an image where the object we want to select (the guy) is significantly different in color from the rest of the image. The Magnetic Lasso Select Tool works by recognizing the difference between light and dark colors in the image and uses them to define the selection area. If the color differences are slight, this tool will not work as well. But since our guy is darker than most of the background, we should get a fairly accurate selection.
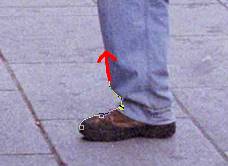
Here are a few things to keep in mind as you move around the outline of the guy:

While the Magnetic Lasso Select Tool works great for making general selections, there will inevitably be areas that are either missed or included when they should not be. These areas are easy to correct.
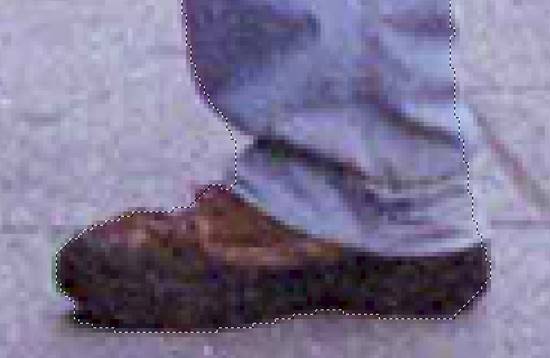
The Lasso Select Tool has a pretty simple function. Click and drag to draw a line, and when you release the mouse button Photopea converts the line to a selection. For what we are doing, since we already have a selection, we need to use the Lasso Select Tool to modify the selection. We can either add to or take away from the current selection.
You should always try to make a circular-ish line when using the Lasso Select Tool. This does not mean that you must always draw circles, just in a circular fashion. You want your line to end up close to where you began. It doesn't have to go to the exact same spot, just in the general area. This is because when you release the mouse button to apply the selection change, Photopea draws a straight line between where you release the mouse button and the first place you clicked. If the two points are not relatively close to each other, you can get all kinds of strange results.
A couple of things to keep in mind as you go around the guy (you can look at my image above to clarify the items below):
Now that we have an accurate selection of our guy, the next step is to get him into our city image.
|
Step 1: Intro
| Step 2:
Selecting | Step
3: Guy in City |
Step 4: Making
Adjustments | Step
5: Shadow |
Exercise |