|
Step 1: Intro
| Step 2:
Selecting | Step
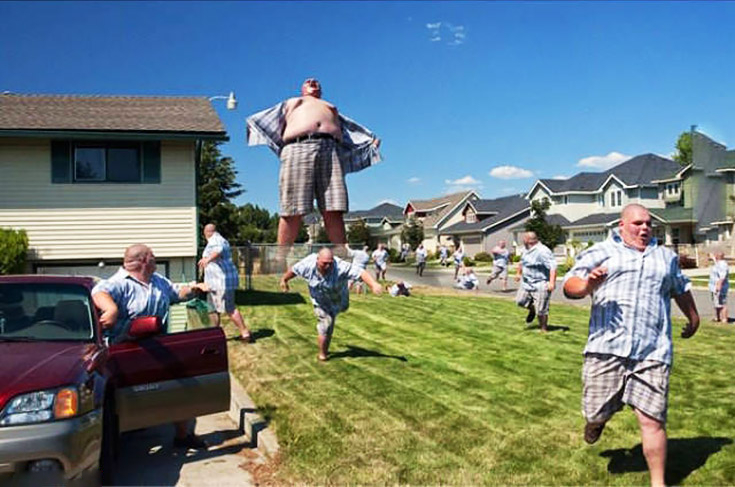
3: Guy in City |
Step 4: Making
Adjustments | Step
5: Shadow |
Exercise |
| Creating a Giant in Photopea |
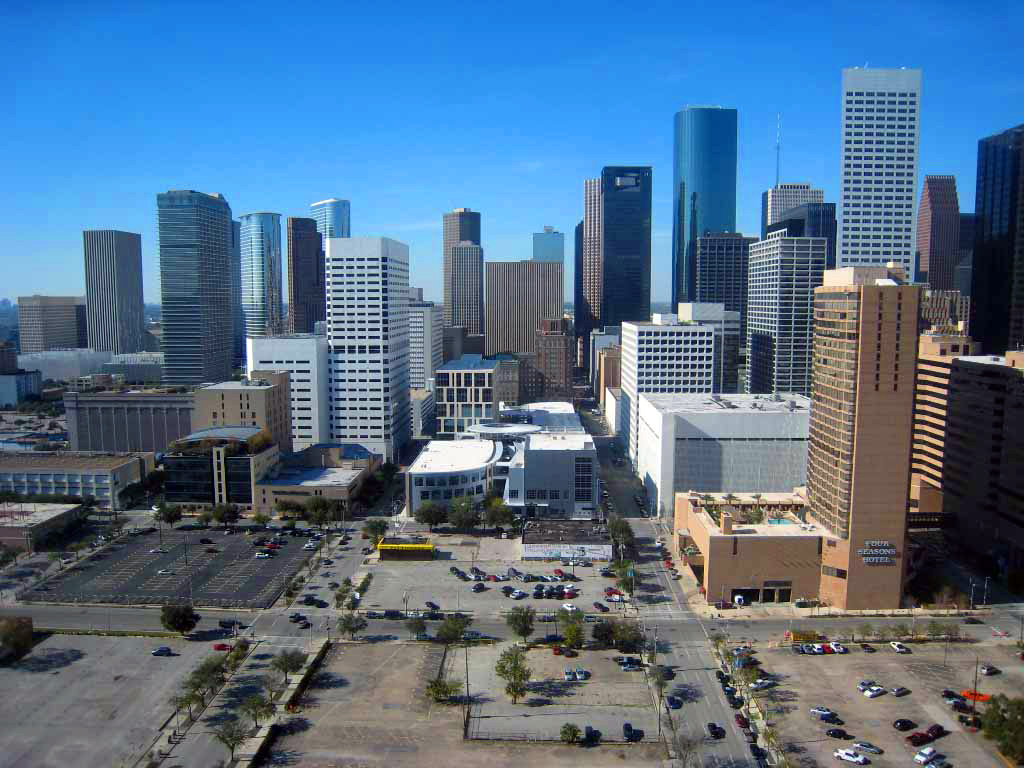
This lesson will give us some good practice making selections in Photopea, then have some fun with those selections. We are going to add an image of a regular person into the image of a city skyline so it looks like the city is being attacked by a giant. This will give you some wonderful practice making selections and adjusting an image so that it looks like it actually belongs in a completely different image. This is one of the most common tasks for graphic designers and photo editors, so pay attention. If you do any image editing in the future, this will likely come up.
For this lesson, we will all work through adding a person to another image, and then you will work independently using the tools and techniques you learn to create a custom image where YOU are the giant.
A few words of caution: This project assumes that you have at least some experience with Photopea, so these directions will not include an overview of the layout of the software or take the time to discuss the difference between tools and filters and other such things. If you have never used Photopea (or Photoshop), then I recommend that you stop now and have a look at a Photopea (or Photoshop) absolute beginner tutorial to gain an understanding of the Photopea workspace. Then you can return here and keep working. If these instructions refer to something that you are unfamiliar with and do not understand how it works, it is your responsibility to look further at the issue to figure it out. Take pride in your work and attempt to solve your own problems - you will enjoy this process much more if you are doing the work yourself.
This tutorial was written for the PC. If you are using a Mac, you can generally substitute the Ctrl key with the Command key and the Alt key with the Option key. If you are having problems, you can look up a keyboard list for the Mac for Photoshop (Photoshop and Photopea generally have the same keyboard shortcuts).
Before we begin, let me address the question most of you were probably thinking of when I explained what this project involved: 'Huh?' You are right in thinking that creating a giant is not exactly the most useful skill in the world. Still, it has come in handy for others in the past. Consider these image...
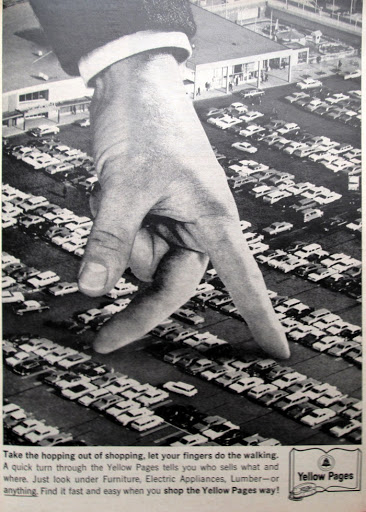
This is an advertisement for the Yellow Pages (an ancient book made of paper - yes, real paper - that contained the phone number and address of every business in the city) from the 1950's. This was an effective ad to drive home the idea of the power and usefulness of the product by showing how the Yellow Pages allows users to quickly move about the city - the way you would if you were huge. Ads like this still appear today...


These are advertisements for Tamiflu - the first was used in magazines and on television and the second was their webpage. The idea is that having the flu is no small problem. It was an effective ad campaign for them. Here are few more examples...

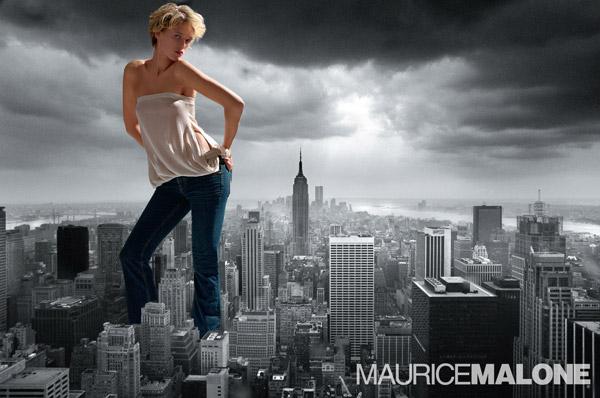
These are advertisements for the fashion designer Maurice Malone intended to show that wearing his clothing allowed you to stand out. Two more...
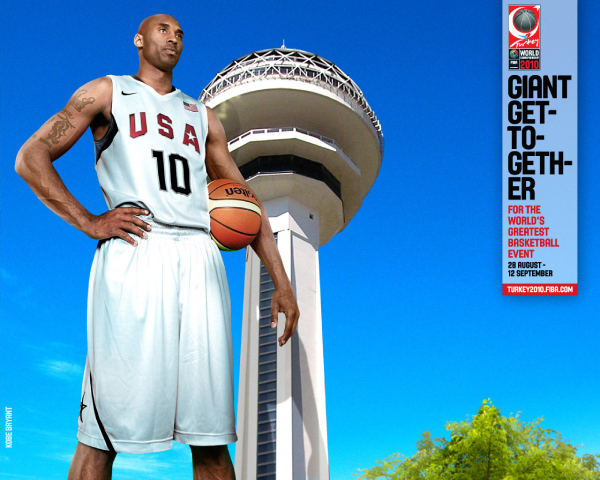
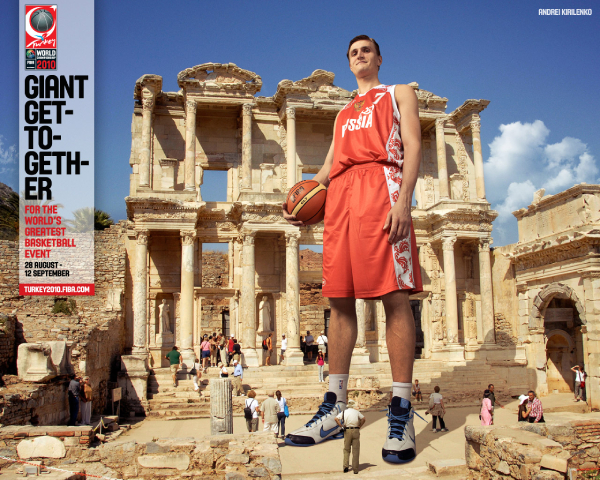
These are advertisements for the FIBA Basketball World Championship in 2010. The tagline 'Giant Get-to-geth-er' is meant to emphasize the fact that the players are the most important thing in the competition and that the level of play will be high. Ok, two more...
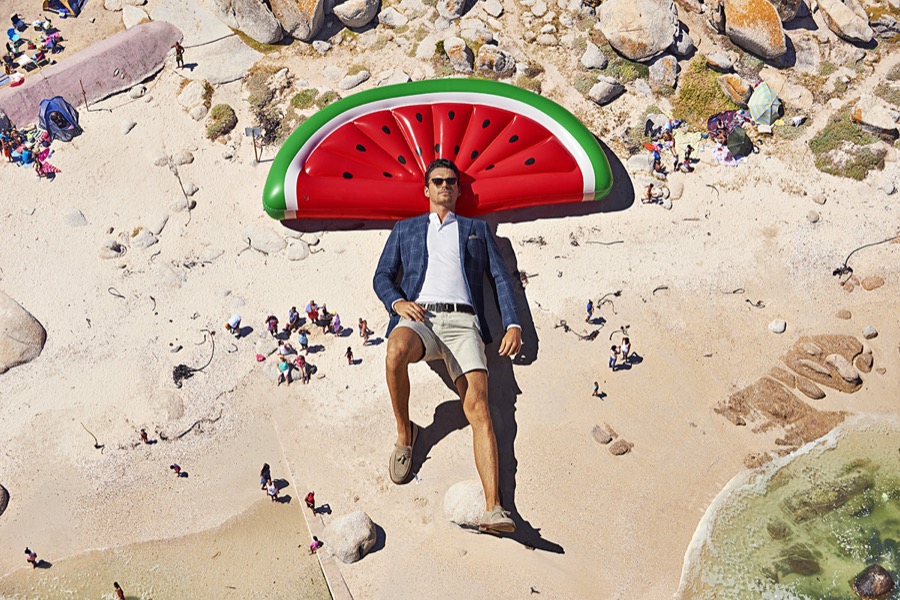
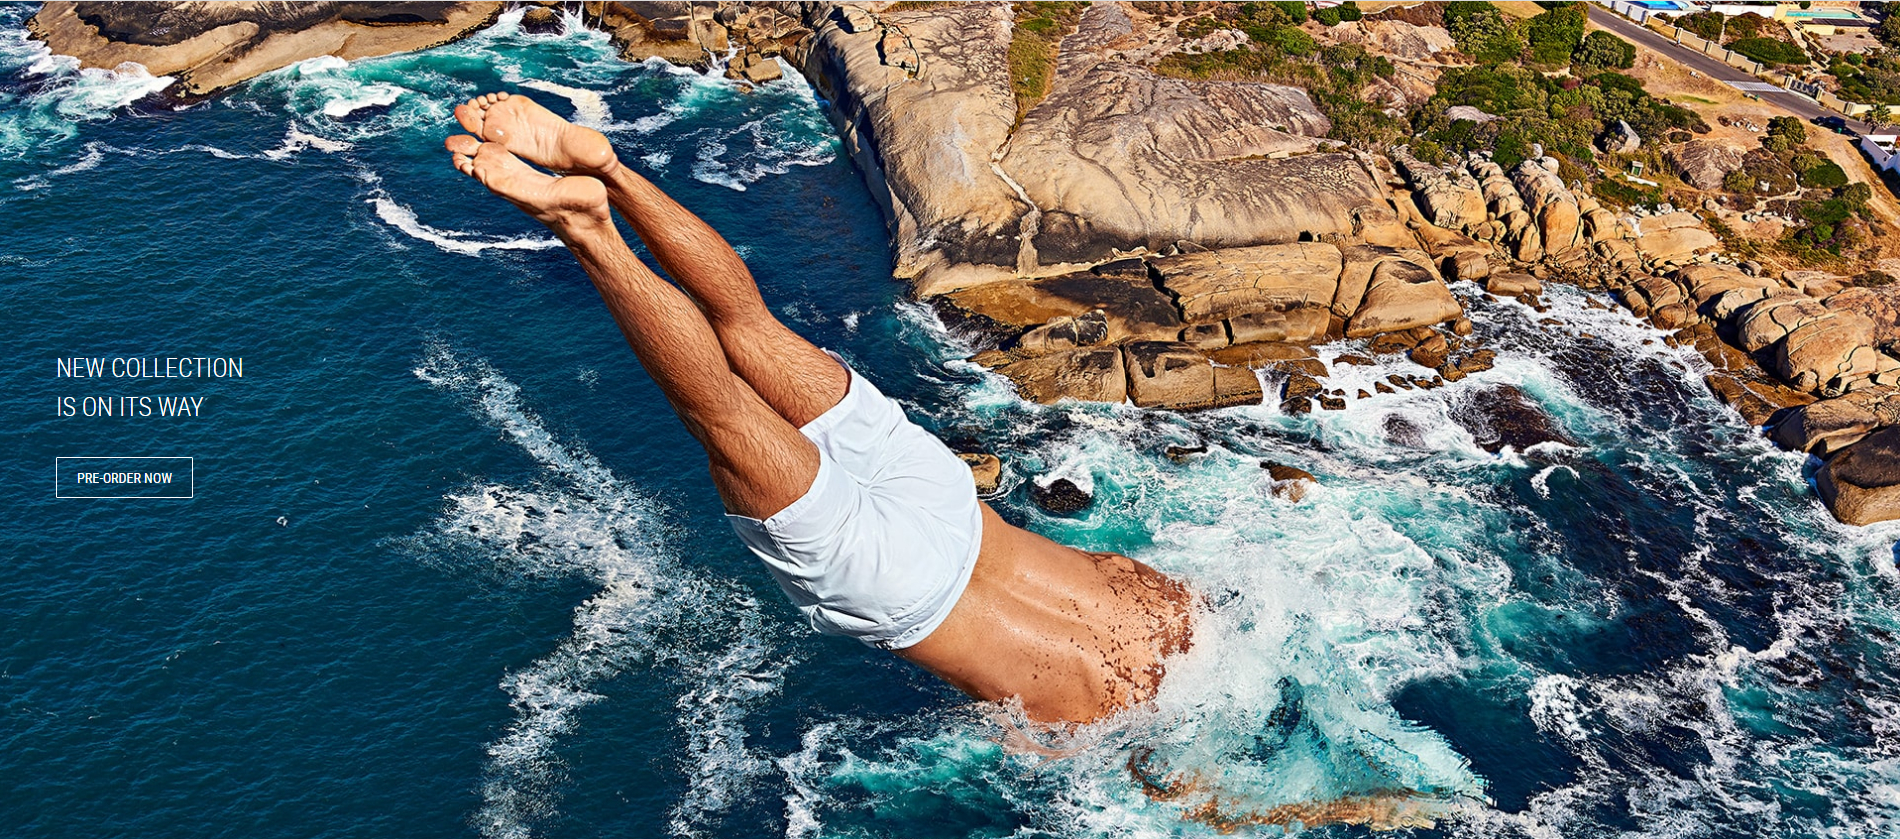
These are two images in a series of ads for Dutch clothing company Suitsupply's beach line of clothing. Let's ignore the fact that the diver in the image above most likely smashed his face into the ocean floor, and focus on how the oversized people make you focus on them and their clothing.
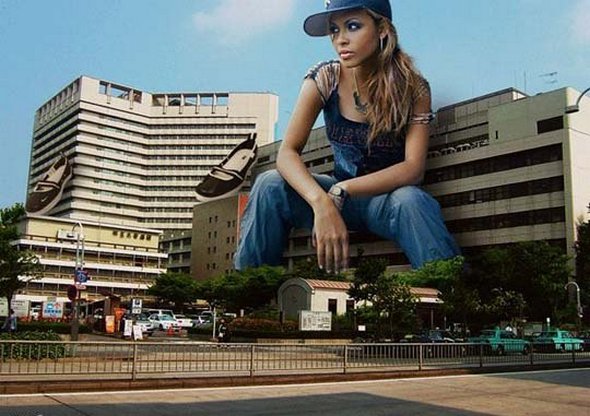
All of these advertisements are meant to get your attention by juxtaposing large individuals in common environments, and they work. But being able to pull this graphic trickery off is not limited to creating mass marketing campaigns. Consider the following images...
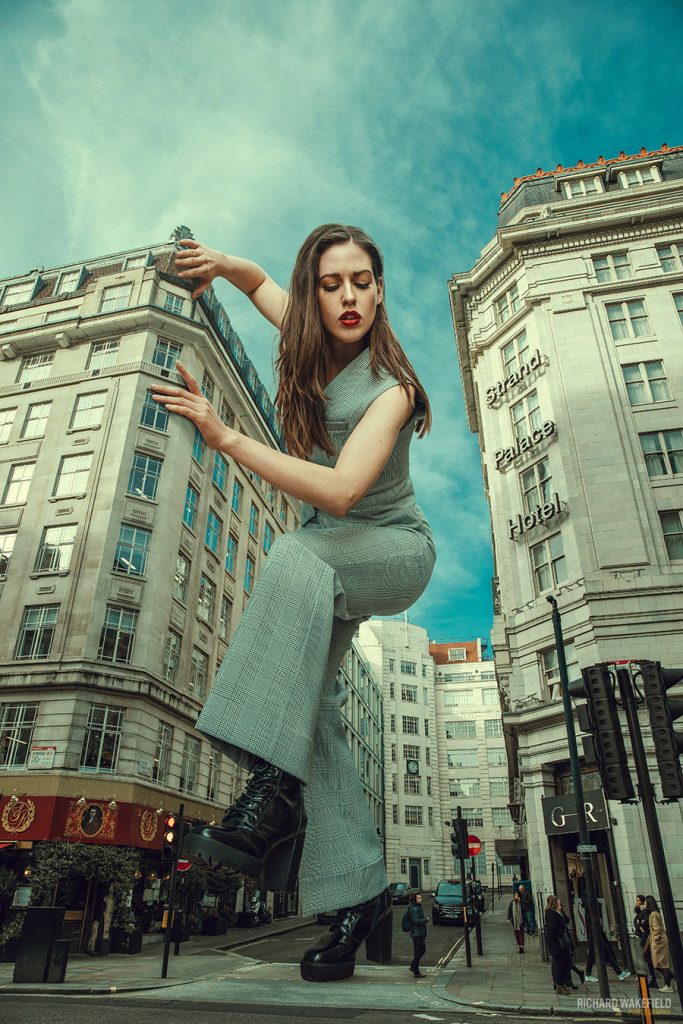
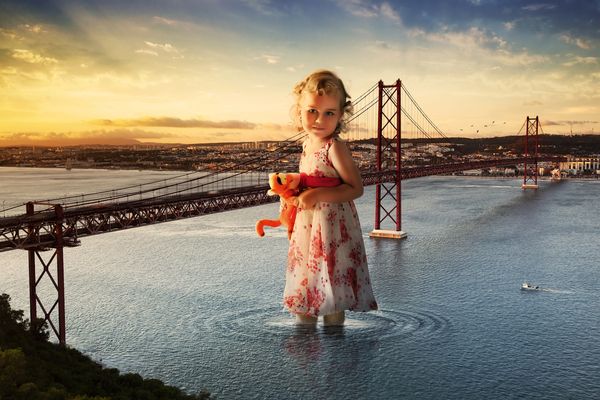
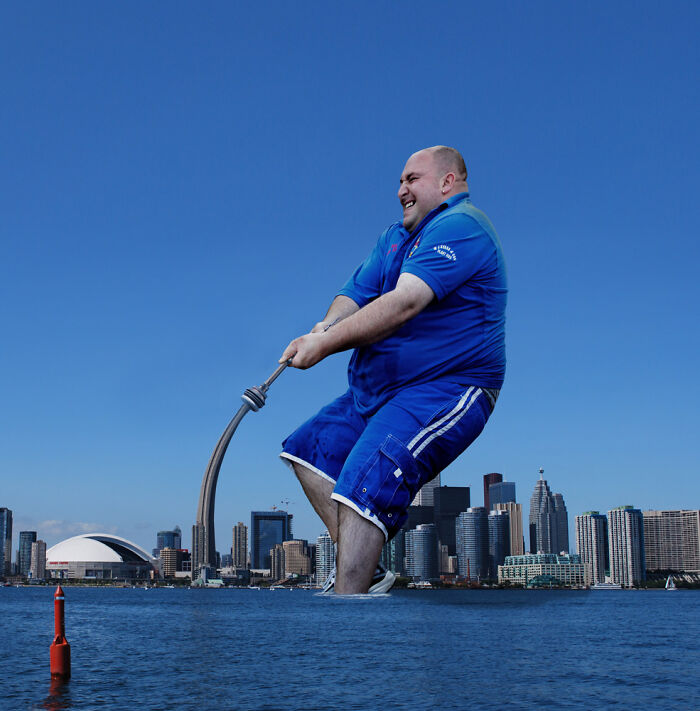
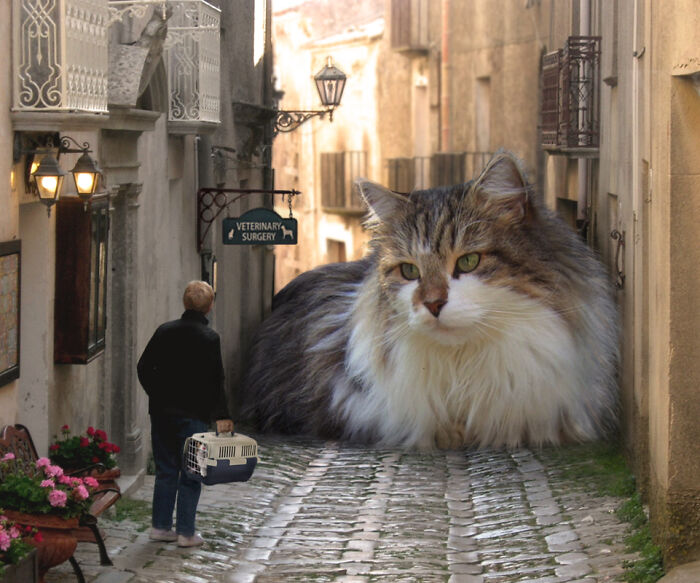

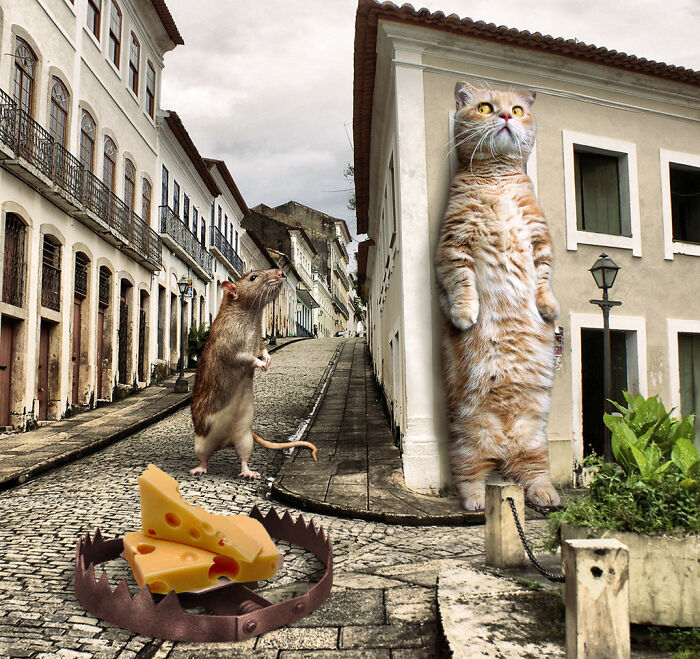
These images were just created for fun (some of them were entries in Photoshop image editing contests - can you tell which ones?). This is what we will be shooting for with our custom images - something that is not only fun, but will show off our photo editing skills.
By the way, if you want to see any of the example images in this tutorial in their original full size so you can take a look at the detail (or if you just want to see it larger), simply click on the image and the full sized version will load in a new browser window.
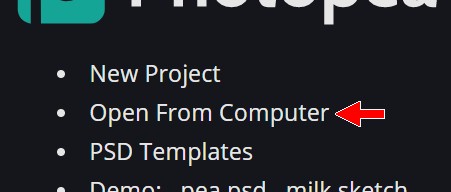
Let's get started on our project by creating a folder on our device to save the images we will be using.
We first need to save the background image.
Now let's save the image of the guy we will be using.
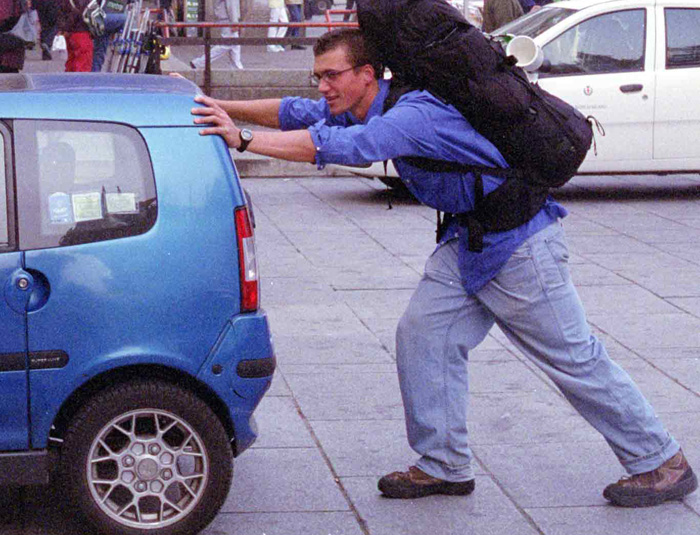
You should now have both images open in Photopea so you can easily move back and forth between the two. In Step 2, we will work on making an accurate selection of the guy in preparation for placing him in the city image.
|
Step 1: Intro
| Step 2:
Selecting | Step
3: Guy in City |
Step 4: Making
Adjustments | Step
5: Shadow |
Exercise |