
| Step 5: The MOUTH |
Step 1: A New Me | Step 2: Eyes | Step 3: Hair | Step 4: Ears | Step 5: Mouth | Step 6: Nose |
At this point you should have new eyes, hair, and ears (you should have two new ears). For the mouth, choose one of approximate size to your own, or one that can be easily scaled without looking silly. In other words, if you have a huge head don't choose a student with a tiny mouth. We will follow the same steps we followed with the other features.
It is at this point that you may run into a slight problem. If you are smiling and the new mouth is not (or the other way around), you may notice that the new mouth does not look very realistic. Take a look at the graphic below...
Because my original guy was not smiling and the new mouth is, it is obvious that the mouth is not real because the cheeks are flat instead of creased, as they would be if he were actually smiling. Compare the above image to the one below...
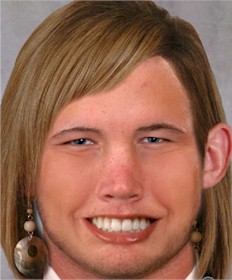
Notice the cheek creases and that the mouth now looks more natural. To achieve the more realistic smile, I simply grabbed the cheek creases of the girl whose smile I used and incorporated them into my original character using some smudging and color adjusting. You can do the same.
|
Step 1: A New Me | Step 2: Eyes | Step 3: Hair | Step 4: Ears | Step 5: Mouth | Step 6: Nose |
|