Step 4: The EARS

Step 1: A New Me | Step 2: Eyes | Step 3: Hair | Step 4: Ears | Step 5: Mouth | Step 6: Nose

You will use the same techniques you used on the eyes and hair to give yourself new ears. Because of their shape and their position on the outside of your head, the ears present a unique challenge.

  1. Open your picture in Photopea
  2. Open the picture of the person whose ear you wish to use
  3. Use the Lasso Tool to draw a selection area around one of the ears
  4. Copy the ear selection and paste it onto your face
  5. Rename the new layer containing the ear to L_Ear (or R_Ear depending on which one you used)
  6. Transform/Warp the ear so that it matches the scale of your head
  7. Position the new ear on top of your old one
  8. Use the Eraser Tool with a solid edge - Hard Round brush set to 20 pixels works well - to trim any background or remaining face parts from your new ear

If you can no longer see your ears thanks to your new hair, it is no big deal. Simply move the new ear layer above your new hair layer so you have what you see in the image below...

It is unlikely that your new ear is the same size as your old ear. We will need to do a little covering up to make our ear look natural. Take a look at the graphic below...

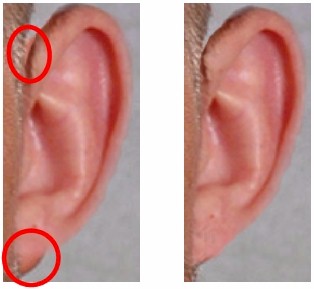
Notice that inside the circles on the left you can see pieces of  the old ear, but no longer in the image on the right. This was easily accomplished using the Clone Stamp Tool, which allows you to select a portion of the image you would like to copy as you draw on your image. In other words, we can actually extend a portion of the new ear so that it is larger and covers more area.

  1. Click on the Clone Stamp Tool...
  2. Determine what portion of the image you would like to copy, in the ear example above we are going to fix the problem at the top of the ear by using other parts of the ear - notice that the Clone Stamp Tool's normal shape is a circle...

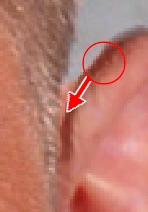
We want to make a section of the ear just above the problem area and copy it down over the original ear. To do this, we need to let Photopea know the area we want to copy (or clone) and then we can begin drawing.

  1. Be certain you are using a large enough brush: 5-10 seems to work well for what we are doing
  2. Position the cursor over the area you wish to clone (the part of the image you wish to copy)
  3. Press and hold the Alt key - the cursor should turn into a target...
  4. Click the spot where you want to begin cloning and release the Alt key- it will look as though nothing happened, but Photopea has placed a marker at that spot
  5. Move to the area you wish to draw over and begin drawing by clicking and holding the left mouse button and dragging the mouse around to draw over the area we no longer want - Photopea replaces what is currently there with whatever is located at the target you placed in the above direction...
  6. Draw in small strokes to keep the work manageable - it will be necessary to reset your target often - as you draw, a plus will appear at the target area to let you know where you are pulling color from while a circle appears at the spot you are dropping color to
  7. Continue clone-stamping until the ear looks natural

Using the Clone Stamp Tool takes some getting used to - take your time and work slowly until you get what you want. Don't freak out if it does not work immediately - nothing works perfectly the first time you use it. Remember that we want the new pieces of our head to look as realistic as possible, so make sure that everything blends together nicely and has no obvious edges or extra pieces.

  1. If the new ear is a different skin tone, use Photopea's Adjustments Tools to make the skin color match yours

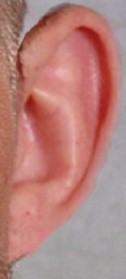
When finished, you should have a nice looking ear...

  1. Repeat the above directions to create the other ear
  2. Save As PSD in your A New Me folder as ANewMe_name.psd

By now you should be looking sufficiently freakish. Remember that each new facial feature you add should be on its own layer. We have two more features to replace: the mouth and nose.


Return to Step 3: The HAIR

Go to Step 5: The MOUTH


Step 1: A New Me | Step 2: Eyes | Step 3: Hair | Step 4: Ears | Step 5: Mouth | Step 6: Nose