|
Step 1: Intro | Step 2: Brush/Pencil | Step 3: Spot Healing Brush | Step 4: Healing Brush | Step 5:
Patch | Step 6: Content-Aware Move | Step 7: Content Aware Fill | Step 8: Clone
| Step 9: Combining Tools
| Exercise |
| Removing Objects with Photopea |
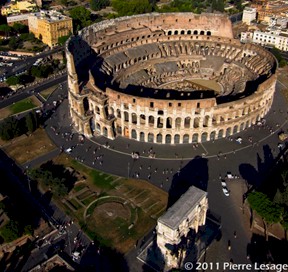
One of the most common uses for Photopea (and Photoshop) is to remove objects from images. Photopea has a variety of methods to allow you to pull this off. If you have a series of images taken from the same spot, you can use image stacks to get rid of unwanted items. But what if you only have a single image? In this lesson, we will look at a variety of techniques to remove objects from an image in Photopea. We will start with an aerial shot of the Roman Colosseum littered with tourists and cover multiple ways to remove the people so that all we are left with is the building itself. We will go from this...
To this...
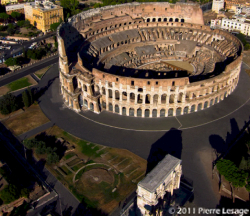
Please do not try to download and turn in the above image. I
will know and you will get a zero.
Note that the people and vehicles are missing from the bottom picture. We will work together to cover various ways to remove items, and then you will work on your own to complete the removal of the people and various other objects. When we finish these instructions, you will select an image of your own from a group of aerial photos and work independently to remove the people and objects from it using what you have learned in this lesson.
A word of caution: This project assumes that you have at least some experience with Photopea, so these directions will not include an overview of the layout of the software or take the time to discuss the difference between tools and filters and other such things. If you have never used Photopea (or Photoshop), then I recommend that you stop now and have a look at a Photopea (or Photoshop) absolute beginner tutorial to gain an understanding of the Photopea workspace. Then you can return here and keep working. If these instructions refer to something that you are unfamiliar with and do not understand how it works, it is your responsibility to look further at the issue to figure it out. Take pride in your work and attempt to solve your own problems - you will enjoy this process much more if you are doing the work yourself.
|
Keep in mind that while we will be using Photopea's tools to clean up an aerial photo of a landmark, that the techniques we will cover can be used to remove anything from any image. Got a picture with a pole in the background that looks like it is coming out of your head? No problem. Does it turn out there was a person walking through your fantastic beach photo? Piece of cake. No longer dating that loser and want to remove them from your vacation photos? Can do. When you finish this lesson, removing any object from any image will not be a problem. |
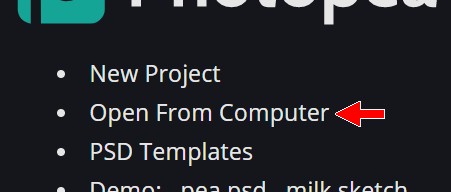
Let's get started by getting the picture we will be using open in Photopea.
Photopea gives us seven basic ways to remove items in an image (there are actually a few more, but they require multiple images and since we only have a single image, we'll go with these):
Don't worry if the above descriptions are vague and difficult to follow - they are meant to simply be an overview. When you have used each tool and have experience, everything will make sense.
Below is a handy table that is a great reference for how each of the seven options work, to help you decide when to use each:
Brush/Pencil |
Spot Healing Brush |
Healing Brush |
Patch |
Content-Aware Move |
Content Aware Fill |
Clone Tool |
|
Blending of colors |
No |
Yes |
Yes |
Yes |
Yes |
No |
No |
Requires sample |
No |
No |
Yes |
No |
No |
No |
Yes |
Requires selection |
No |
No |
No |
Yes |
Yes |
Yes |
No |
Requires selection move |
No |
No |
No |
Yes |
Yes |
No |
No |
Can be used near an edge |
Yes |
No |
No |
Yes |
Yes |
Yes |
Yes |
As you can see, no two tools work the same and there is a wide variety of possible tools and uses. To learn how each of these tools work - and more importantly when it is most efficient to use each one - we will work with our image to practice each tool.
Let's save our image as a Photopea file.
Each of the following 7 Steps of this lesson are short and designed to give you quick experience using a specific tool/technique. You will get an opportunity to practice with each tool/technique in Step 9 when you will remove the remaining people from the Colosseum image and save that file to submit to be graded.
In Step 2, we will use the Brush/Pencil tool to make some basic adjustments.